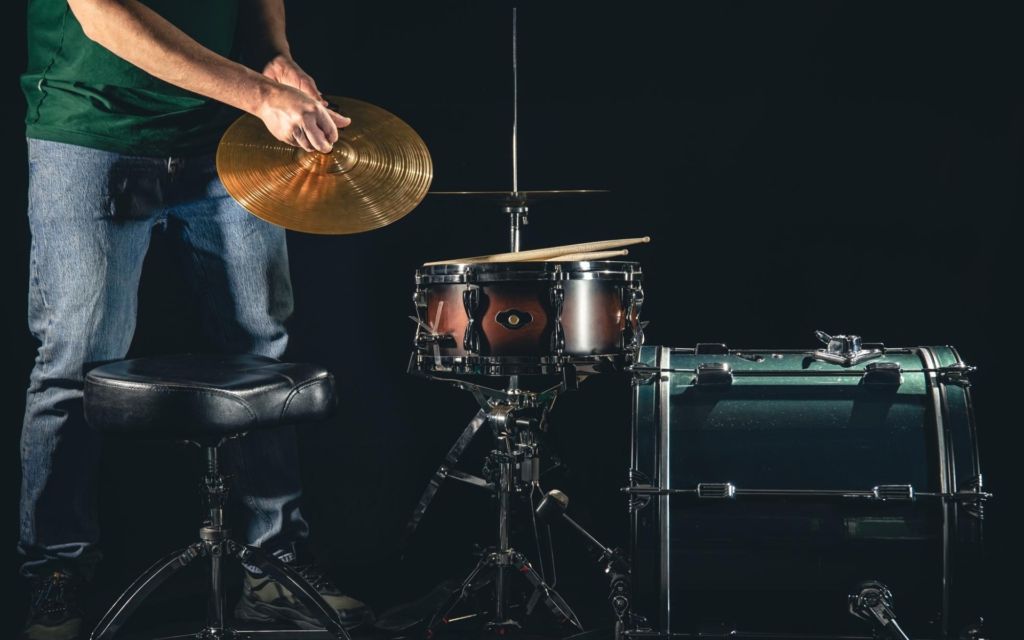
Do you struggle to get your drums to sound naturally wide and open? Honestly, the difference between your drums in mono and stereo is incredible.
Mono is where your whole drum kit recording sits dead in the center of the stereo field, and stereo is where your drums are panned in accordance with your setup.
Panning drums makes all the difference and will make listening to your drums feel like you’re actually there in the room.
What follows is my ultimate guide on how to pan drums; so you can produce amazing sounding and spacious drum recordings every time!
Contents
Who’s Perspective Do I Pan Drums From?
There are two different ways you can pan drums. It is beneficial for you to know this and in what situations either one will be more beneficial to you, depending on what you’re working on.
Firstly you could pan from the listener’s perspective (or the crowd’s). This means you need to picture someone facing you whilst watching you play. You would then pan your kit from their perspective, not yours (the drummer’s).
This would be most useful for your drum covers, as it will be the listener that will be hearing your kit. Therefore panning it to their perspective will sound great and match with the video, giving them the feeling that they’re there.
Some audio engineers prefer to pan their drums to this perspective as it’d be more like listening to the band live for the listener. However you don’t have any visuals when listening to music, so panning whilst mixing a full track can be down to personal preference.
The second way to pan your drums is from the drummer’s perspective, so from left to right what the drummer sees. This is my personal preferred way to pan drums when mixing a full track, you may choose the perspective which generally seems to fill the stereo field better in your music.
Important Note for Drum Panning
Just to clarify before we get stuck in, this is a rough guide for you to start learning how to pan your drums or give you extra insight. Don’t take these values as concrete, I think it’s important to mention that everyone’s kit is different, whether that be the position or the order of the drums from left to right.
Therefore it’s important to pan your kit to match how your drum set looks, especially if you’re recording a drum cover. Let’s dive in!
Clockwork
When I mention a time for example 4:00 (4 o’clock), this is the imagery I will use to explain where the panning dial is set, where the hour hand would be pointing. For example, 4:00 would be very hard (far) panned to the right, 12:00 would be dead center.
Drum Panning Chart
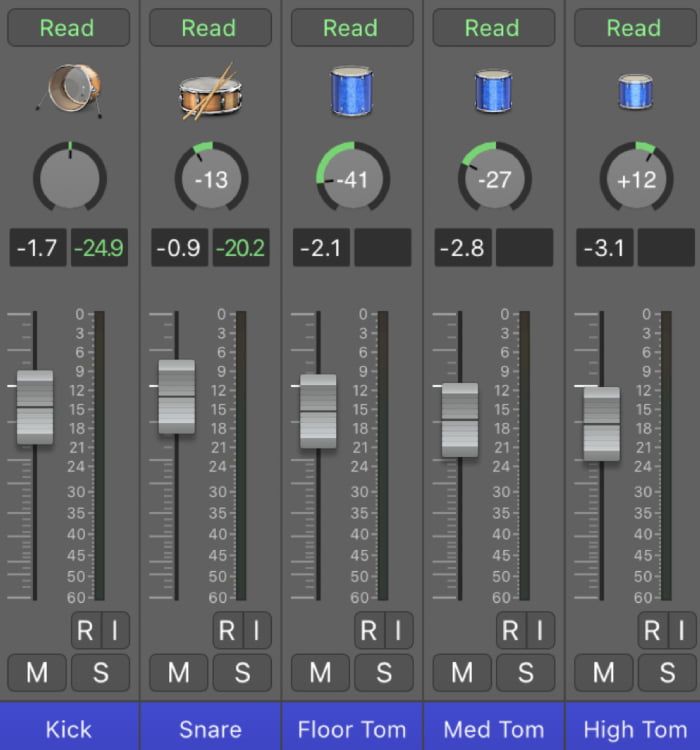
Kick
There are not many things I’d say in the creative world where there’s a definite right or wrong, music is about creativity and breaking boundaries to create new sounds. One exception I’d say though is panning drums when it comes to a kick drum!
This should ALWAYS be dead at 0 (in the center/12:00) of your stereo image. Your kick drum will usually lock in with the bass guitar in the center to provide that low-end punch and feel.
Snare
There are a few options with snare drum panning, I’ve seen some engineers prefer to have this dead at center and I’ve seen some that prefer to have it slightly off. If you choose the latter I personally wouldn’t have it more than +/-20% either left or right (between 11:00 and 1:00).
I do prefer to pan my snare off-center as it gives more variance between the stereo image of the kick and snare, and often gives the snare a bit more room to breathe, not fighting for space with any other instruments or layers in a mix.
Another way would be to match your snare panning up with where it appears on the overhead mics. If the snare is very prominent in your overhead mics and you intend to use them to thicken your individual snare mic, I’d highly recommend this.
If you pan your snare, or even toms too for that matter, differently to where they appear in your left and right OH mics when panned, this is going to sound incredibly messy and confusing to the listener.
Simply pan your overhead mics hard left and right (as far left and right as they go), shut your eyes, and listen to where you can picture these drums in front of you. Then pan the individual drum to match where they are on the overheads. This does take practice by the way!
Toms
As mentioned in the previous paragraphs, your best bet with panning your toms could be to pay attention to the placement of your overhead mics, depending on how your overheads are recorded and how you intend on mixing them. If you don’t choose to go down this route, here’s my personal technique.
Bearing in mind I’m an editing/mixing engineer, I love my kit to be widespread, especially in the context of a full mix. You may find these values are quite far off from what you expect or what you think sounds good to you.
If so then feel free to play with these and see what sounds best to you. To start off with the floor or low tom, I like this to be over 50% left or right (depending on the perspective), sitting at about 9:00 or 3:00. I will then pan the two rack toms on either side of the snare to give a really cool stereo effect during drums fills.
Whichever side the floor tom is on, I put the middle tom on that side at either 10:00 or 2:00. Then I pan the high tom by less than 20% on the other side, so either at 11:00 or 1:00, the opposite side to the snare (if you choose to pan the snare).
Overheads
With overheads, I personally prefer to pan them hard left and right (7:00 and 5:00) because it’s the way I was taught and I do prefer it. For a less open stereo image, some people prefer to go less drastically left and right at about 8:00 and 4:00.
I personally prefer taking overheads to the extremes because it gives you the widest possible spread which feels more open and sounds better to me. If you’re editing a drum cover, this may be the best option for you.
This is because you haven’t got a full mix going on, so you may want to fill up as much of that room in the stereo field as possible, for a fuller, broader sound.
Hi-hat
Similarly to your snare and toms, you may want to match your hi-hat mic to where it appears in your overheads. This is of course if you have both used overheads tracks and have mic’d your hat separately too.
Otherwise, I like to keep my hat tight to snare and have it one ‘hour’ further left or right than where the snare is. So say if I have the snare at 1:00, I will have my hi-hat at around 2:00.
Record Your Overheads Correctly (TOP TIP)
Before you hit the record button, decide on which perspective you will be panning to at a later stage. Once you’ve decided this, make sure you label your overhead channels in your DAW in the same way. You won’t want to get these muddled up as it makes trying to pan and match things up confusing during mixing.
Watch Your Audio Levels
You may find during drum panning, because you’re using up all this free space that wasn’t occupied before, individually some things may appear louder (especially widely panned toms). Just keep this in mind and be sure to go over and adjust any levels as required after panning.
This has been our ultimate guide to panning drums. These are just the basic principles behind panning so you can go and find out what works for you individually and your own unique sound.
━━━━━━━━━━━━━━━━━━━━━━━━━━━━━━━━━━━━━
This guest blog was written by my friend Eddie at Professional Musician Academy. The Professional Musician Academy is the #1 online business school for aspiring professional, hired-gun, and session musicians. Their mission is to help you monetize your passion for music so you can do what you love for a living.