The hi-hat stand can be a slightly confusing hardware component. If you’re new to setting a drum kit up, it’s the one stand that may lead to a bit of a headache when trying to figure it out.
So, I’ve put together a guide to help you understand all the mechanics of hi-hat stands. We’ll briefly look at all the parts and explore what they do, and then I’ll give you a step-by-step guide on constructing a hi-hat stand straight from the box.
Contents
Choosing a Hi-Hat Stand
You most likely own a hi-hat stand already. But if you’re looking to get one, I’ve written out a comprehensive guide for choosing the best hi-hat stand.
Hi-hat stands are quite universal in how they’re designed, but you’ll find a few differences, like the number of legs, whether it has a baseplate or the way the pedal operates.
You can also get other types of stands like remote hi-hat stands, but we won’t worry about those for now.
Parts of a Hi-Hat Stand Checklist
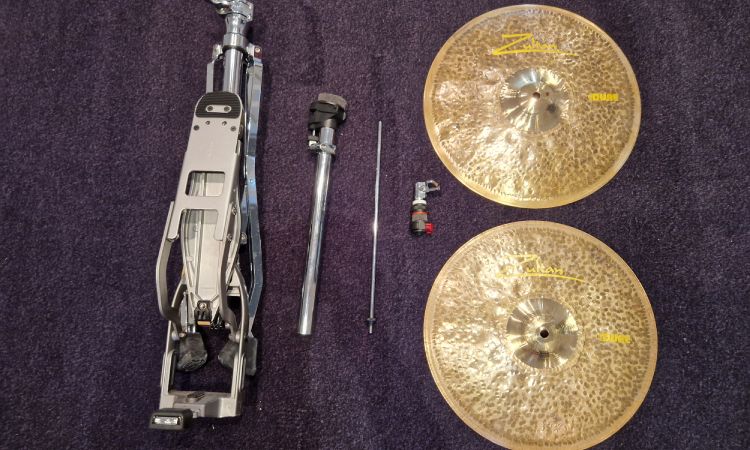
Here are all the parts of a hi-hat stand that you need to make sure are there:
- Base stand – including legs and pedal system
- Lower tube – the metal tube just above the legs
- Upper tube – the thinner tube rod above the lower tube
- Angle screw and washer – these rest on top of the upper tube
- Rod – a solid rod that screws into the tubes
- Clutch – a metal piece with a washer, felts, and wingnuts
- Hi-Hat cymbals– including a bottom and top hi-hat
Also, make sure that you have a drum key with you, as many hi-hat stands have screws that can only be loosened or tightened with one.
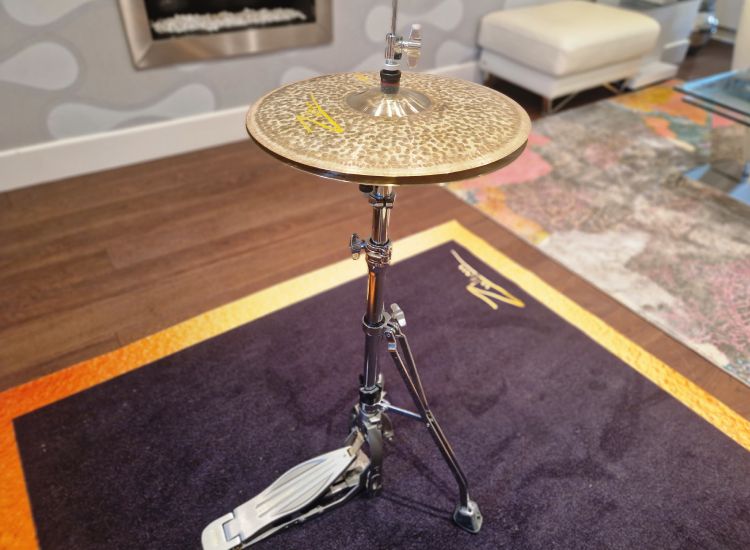
Step-By-Step Guide to Assembling a Hi-Hat Stand
Once you have all your parts ready, you can start setting the stand up. We’re going to start at the bottom and work our way up, as that’s the easiest way to assemble a hi-hat stand.
1. Open the Legs
When you unbox all the hi-hat stand parts, it’s common for the legs to be collapsed. This means that they’ll be resting tightly to the metal piece, and you won’t be able to stand them up. So, you need to start here to form a stable base for the rest of the stand to lean on.
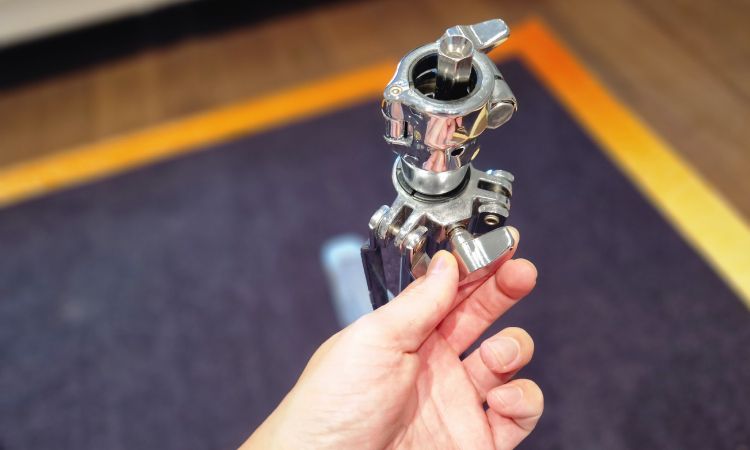
To open the legs of a hi-hat stand, you need to loosen the wingnut on the piece of metal that they’re all connected to.
Once you do that, you can pull the legs apart and stretch them so that you get a tripod setup that holds the hi-hat stand upright.
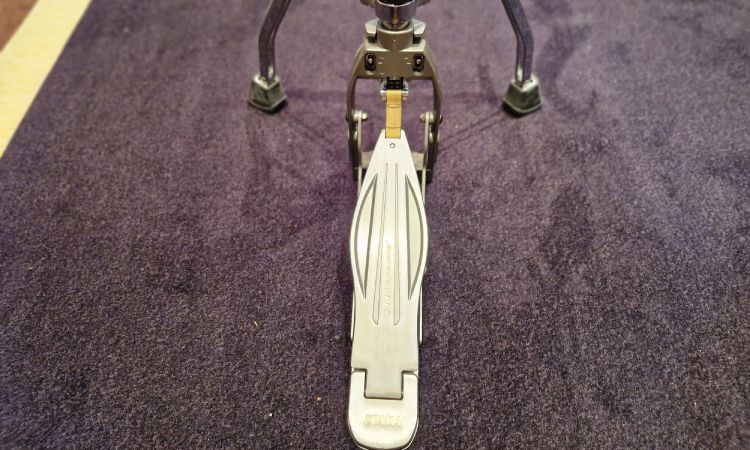
You need to pull them out far enough for the brackets that hold the pedal to be resting firmly on the ground. If those brackets are off the ground, it means the legs haven’t been stretched wide enough, and the stand will feel wobbly when you play.
Typically, a flatter set of legs would lead to more stability from other stands. However, hi-hat stands have a standard setup, and you just want to have the legs far enough for the base of the pedal to be touching the ground.
Once you make sure that the anchor of the pedal isn’t too high off of the floor, you’re good to go.
2. Secure the Pedal
Once the legs are open, you may need to lock the pedal in place, depending on the type of hi-hat stand you have.
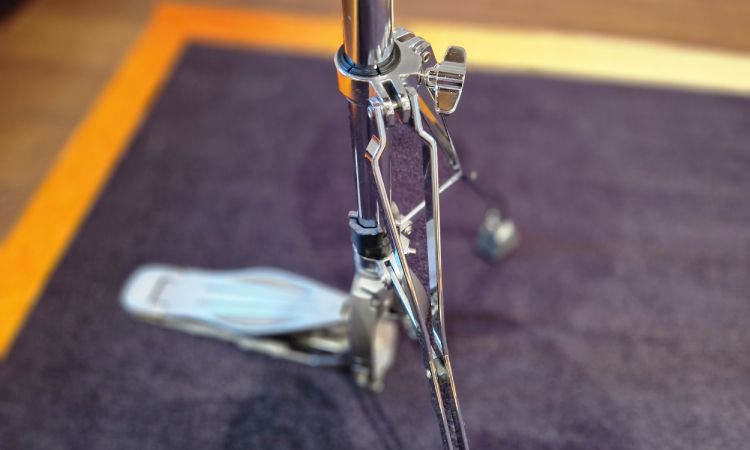
Oftentimes hi-hat pedals have small rods that stick out the back. The brackets under the bottom tube have holes where these rods can stick into.
Once you stick those rods in place on either side, the pedal will sit securely in place. If you don’t secure it like this, the pedal will likely move side to side when you’re playing.
3. Connect the Main Rod
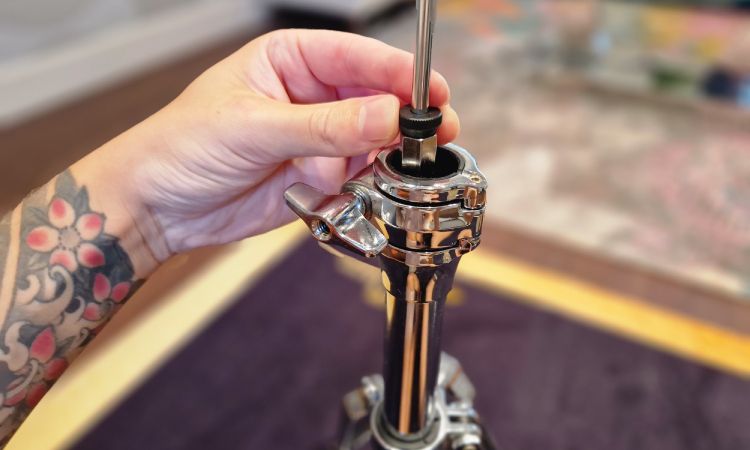
Before attaching the upper tube, you need to screw the main hi-hat rod in place. Every hi-hat stand has a small piece of threaded metal for the rod.
They vary in size, but this threaded part is what goes up and down when you press the pedal. This leads the rod to go up and down once you’ve attached it.
So, screw the rod in, and then press the pedal with your foot to see if the rod goes down when your foot goes down. If it does, you’re good to move on to the next step.
If the rod doesn’t react appropriately with the pedal, you likely haven’t screwed it in tightly and securely.
4. Attach the Upper Tube

Now that you have the rod attached, you can connect the upper tube to the stand. You’ll have to bring it down so that the rod goes through the top part.
The upper tube is the only part of a hi-hat stand that allows you to set a height. It’s a good idea to have your snare drum set up so that you can determine the height in relation to it.
If you like to have your hi-hats high, make sure this upper tube is pushed fairly high above the snare drum. If you prefer having your hats a bit lower, the top part of the upper tube should be just above the snare.
Once you have it in place, tighten the wingnut that you’ll see at the top of the bottom tube.
5. Place the Washer and Felt
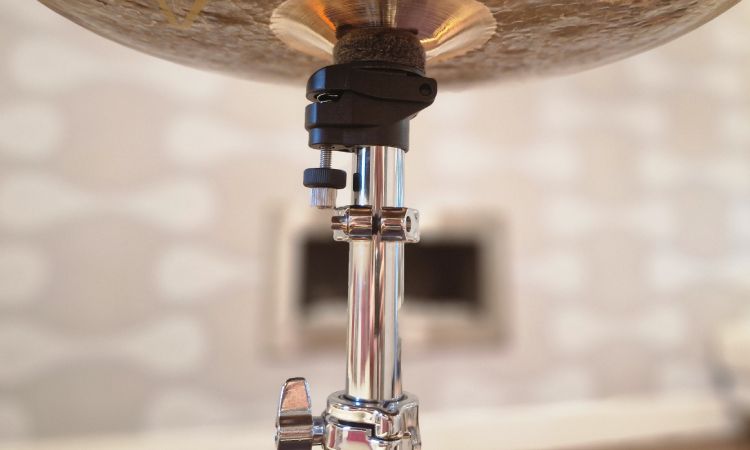
Now, place the plastic washer at the top of the upper tube. You’ll also have a felt that needs to rest on top of that washer.
It’s incredibly important to have this felt here, as the plastic can damage the metal of the bottom hi-hat cymbal.
Whenever you set your hi-hat stand up, always make sure that the plastic washer and felt are in place before placing the cymbals.
6. Place the Bottom Hi-Hat Cymbal
Lower the bottom hi-hat cymbal onto the felt and plastic washer. You’ll see that the cymbal is resting at a certain angle.
You can adjust this angle by tightening or loosening the screw that sticks out of the bottom of the plastic washer.
Many drummers don’t worry about adjusting this angle, but it can make a big difference to how your hi-hats perform. You want your bottom cymbal to be slightly more angled than your top one, as this will give you a better sound when they close together.
If both hi-hat cymbals are evenly angled, you’ll get an air gap between them, leading to a much quieter sound when you press them together.
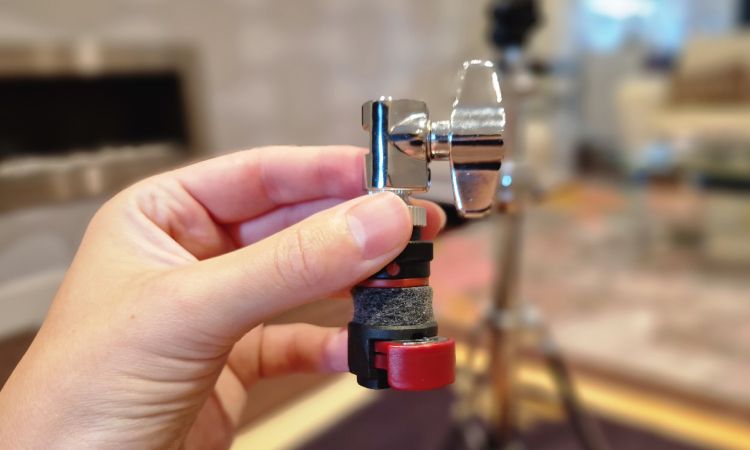
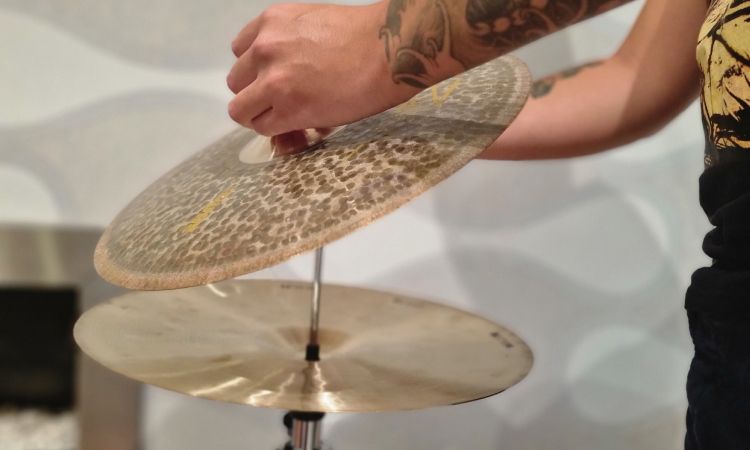
7. Attach the Clutch to the Top Hi-Hat Cymbal
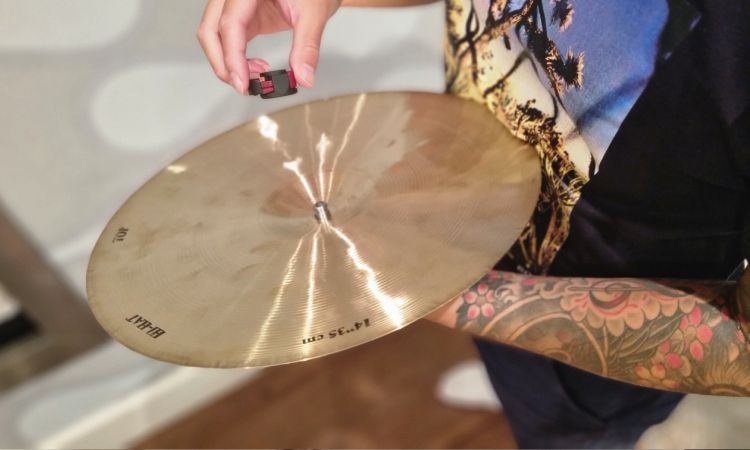
Find the clutch that came with your hi-hat stand. You need to remove the bottom metal piece and one of the felts. Once you’ve done that, you can stick the clutch through the middle of your top hi-hat cymbal.
You then need to put the felt and metal piece back on the clutch tightly. Make sure that there are felts on the top and bottom sides of the hi-hat, as these ensure that the cymbal will be protected.
You can then run the hi hat clutch down over the hi-hat rod, and your hi-hat cymbals will rest against each other.
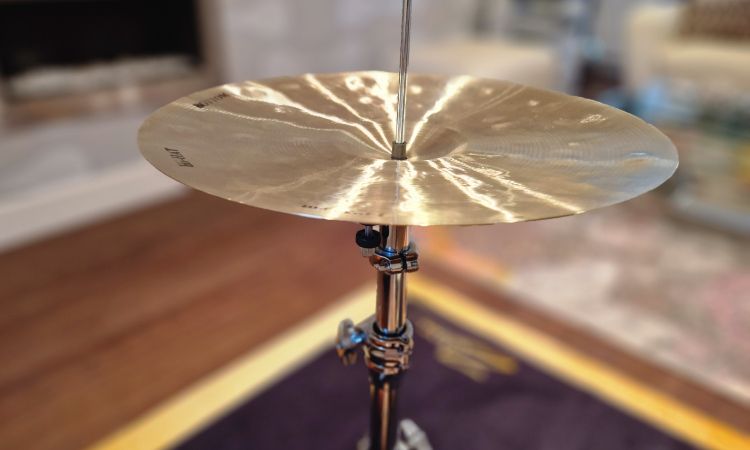
8. Use the Clutch to Get a Gap Between the Hi-Hat Cymbals
The point of the hi-hat clutch is to lock your top cymbal in place so that there is a gap between the two cymbals.
You need to decide how big of a gap you want. Some drummers like to have their hi-hats touching loosely, while others prefer quite a wide gap when the pedal isn’t pressed down. You’ll eventually develop your own preference.
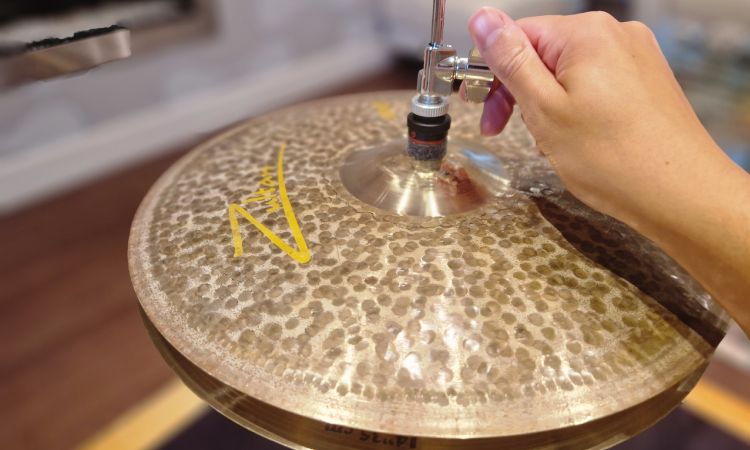
Just make sure that the gap isn’t high enough for the cymbals not to touch each other when the pedal gets pressed down.
9. Perform Fine-Adjustments
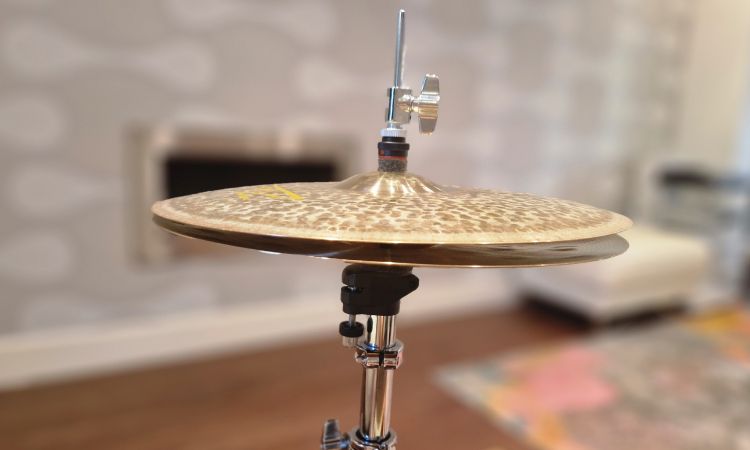
Once your hi-hat stand is assembled, you can place it in your drum kit setup. Once it’s there, you may find that the hi-hats are too high or low. The bottom hi-hat cymbal may also be too angled for the top one.
The last step is to make fine adjustments using all the adjustable parts of the hi-hat stand.
Conclusion
Setting up a set of hi-hats on a stand becomes easy after you do it repeatedly. It’s a good idea to practice doing it a few times before heading to your first gig and potentially getting stuck in the setup process.
Also, don’t underestimate the value of a good hi-hat stand. Many drummers make the mistake of getting a good pair of hi-hats but sticking with a cheap stand.
Cheaper stands feel very flimsy, lowering the overall playability of your cymbals. So it’s worth investing in a high-end hi hat stand as you progress your drumming.
Hi-Hat Stand Setup FAQs
How Do I Stop My Hi-Hat Stand From Moving?
Make sure that your hi-hat stand is resting on a drum rug. If you have it on a hard floor, it will likely shift forward every time you press the pedal down with your foot.
The same thing happens to bass drums, so the best solution is always to have your whole drum kit setup resting on some type of rug or carpet.
Are Hi-Hat Stands Durable?
Thankfully, hi-hat stands are very durable, as most of them last many years without any signs of damage. Just make sure that you’re packing your stand carefully in a case or bag when moving your drum kit around.
The rod is the one part that is most likely to get damaged, as it’s quite thin. It’s recommended to remove the rod and put it in a safe place when transporting the stand.